Playing with Arduino: gyroscope stabilized cup holder
2019-01-05A little project I did during a one-and-a-half days event at my job, with one of my fellow coworkers...

We were both novices with Arduino, and with only a bit more than a day to do something with it, a gyroscope stabilized cup holder seemed like a balanced (pun intended) challenge.
Hardware
Mechanical design
This was a surprise, but the most difficult part was probably not the code or the electronics, but the mechanical hinge.
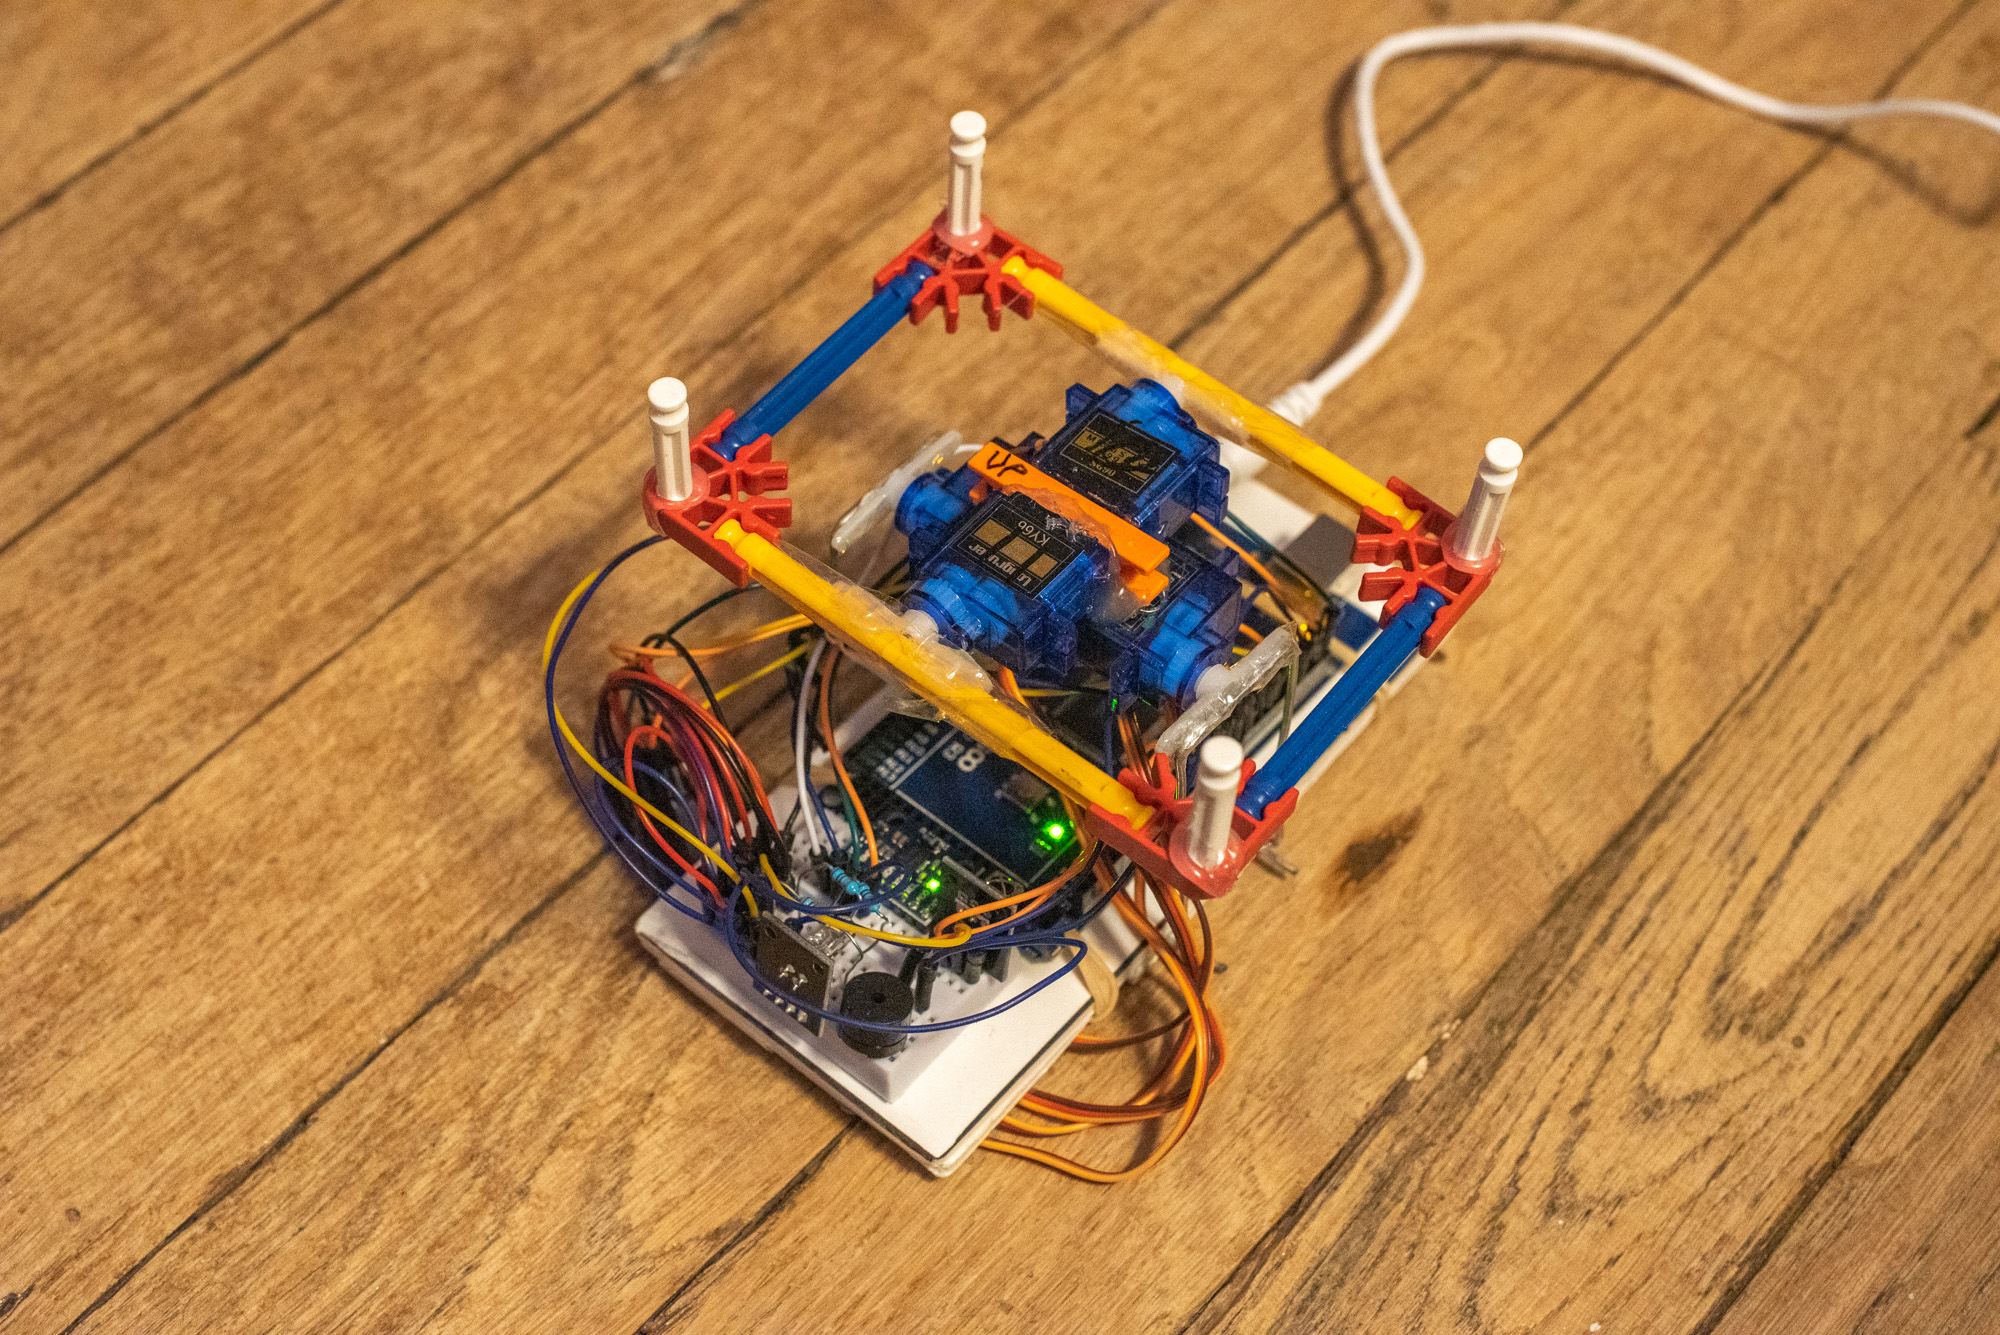
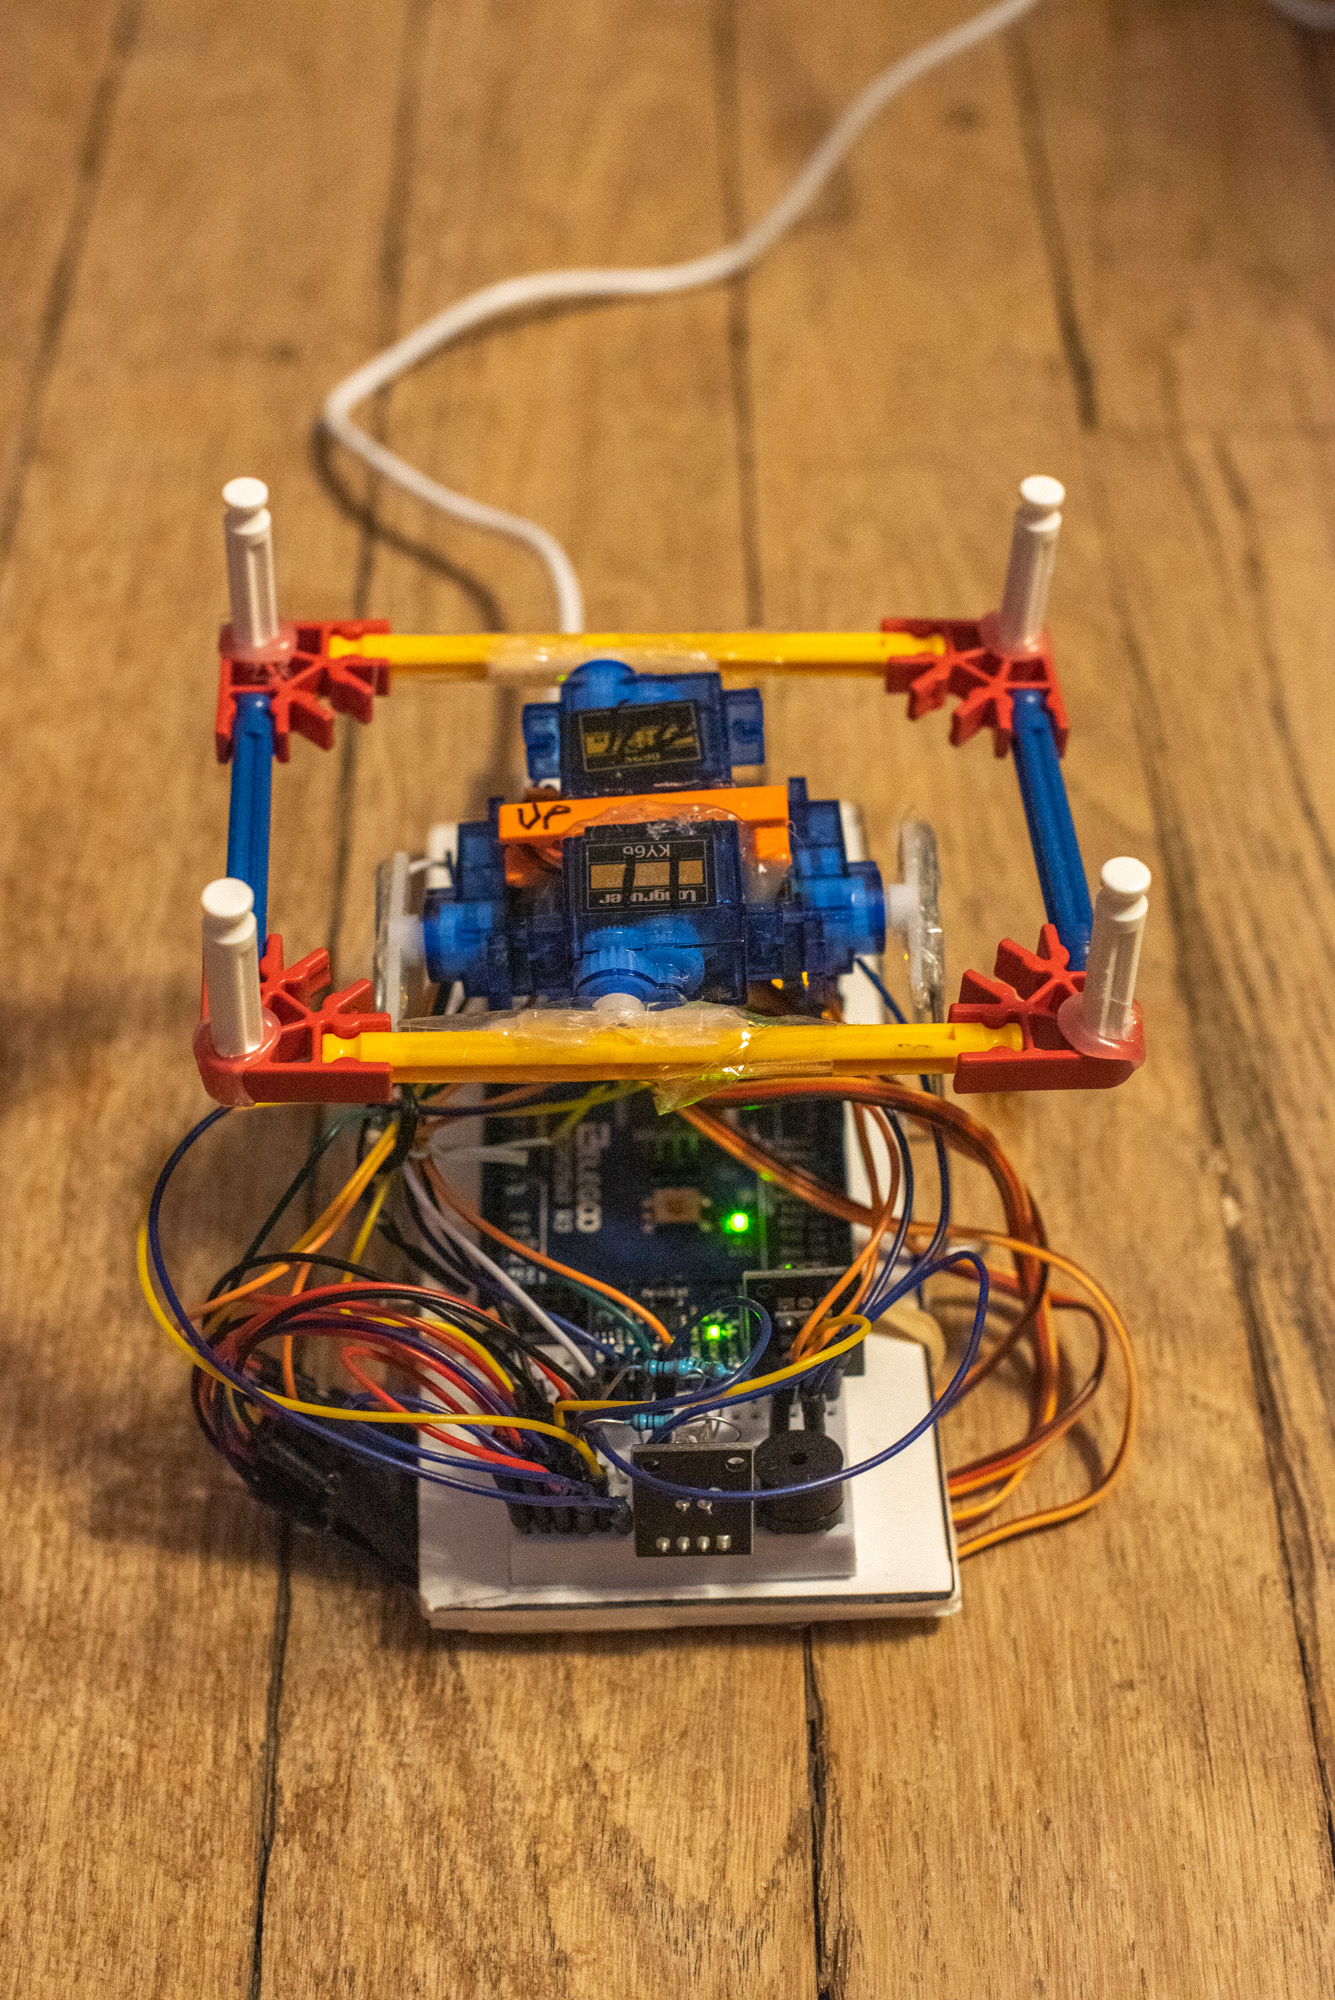
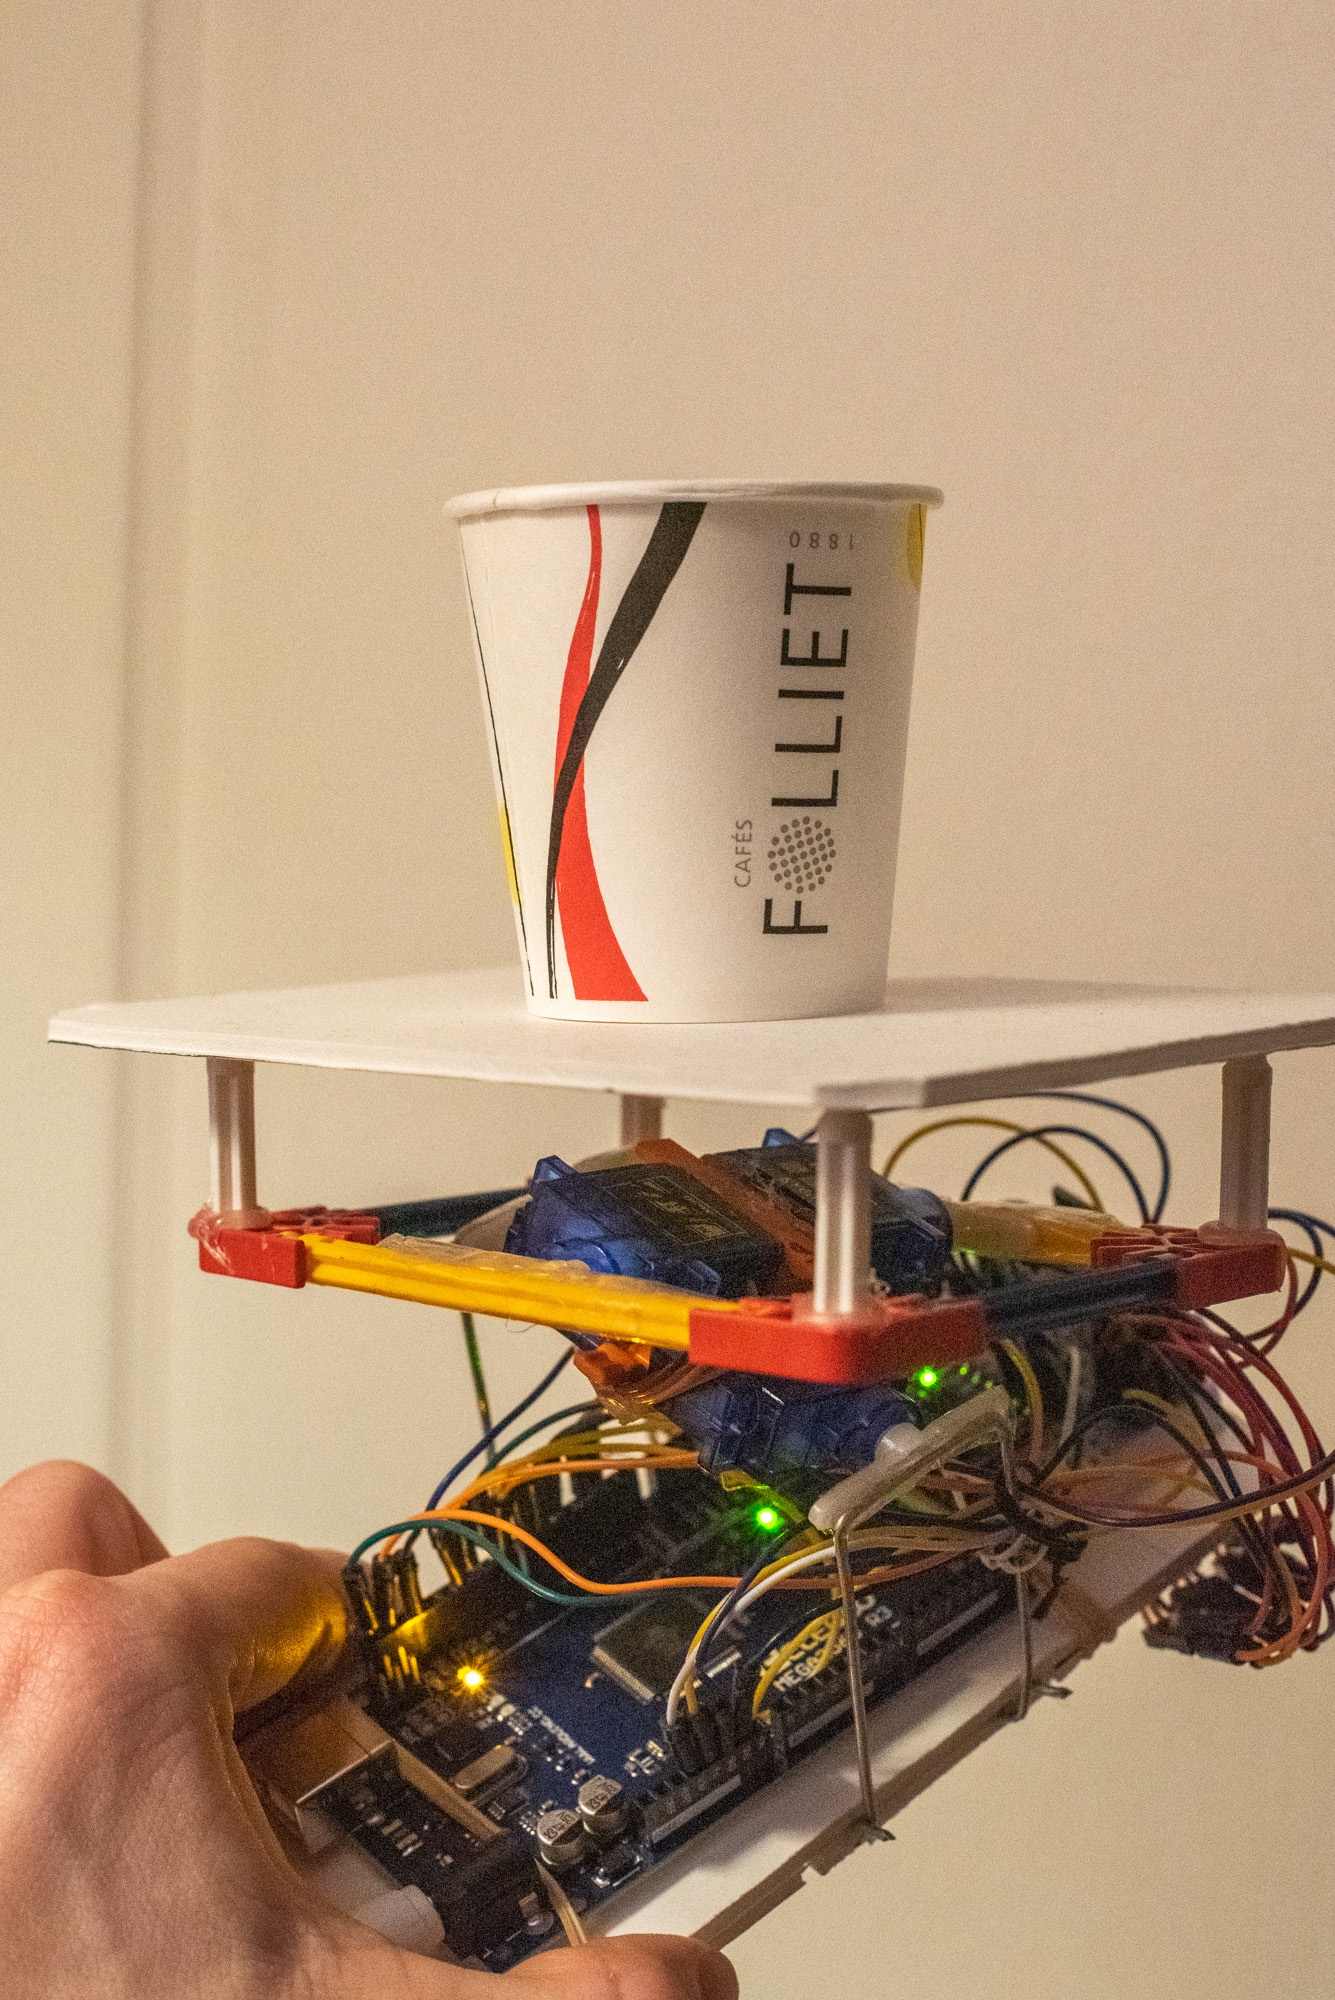
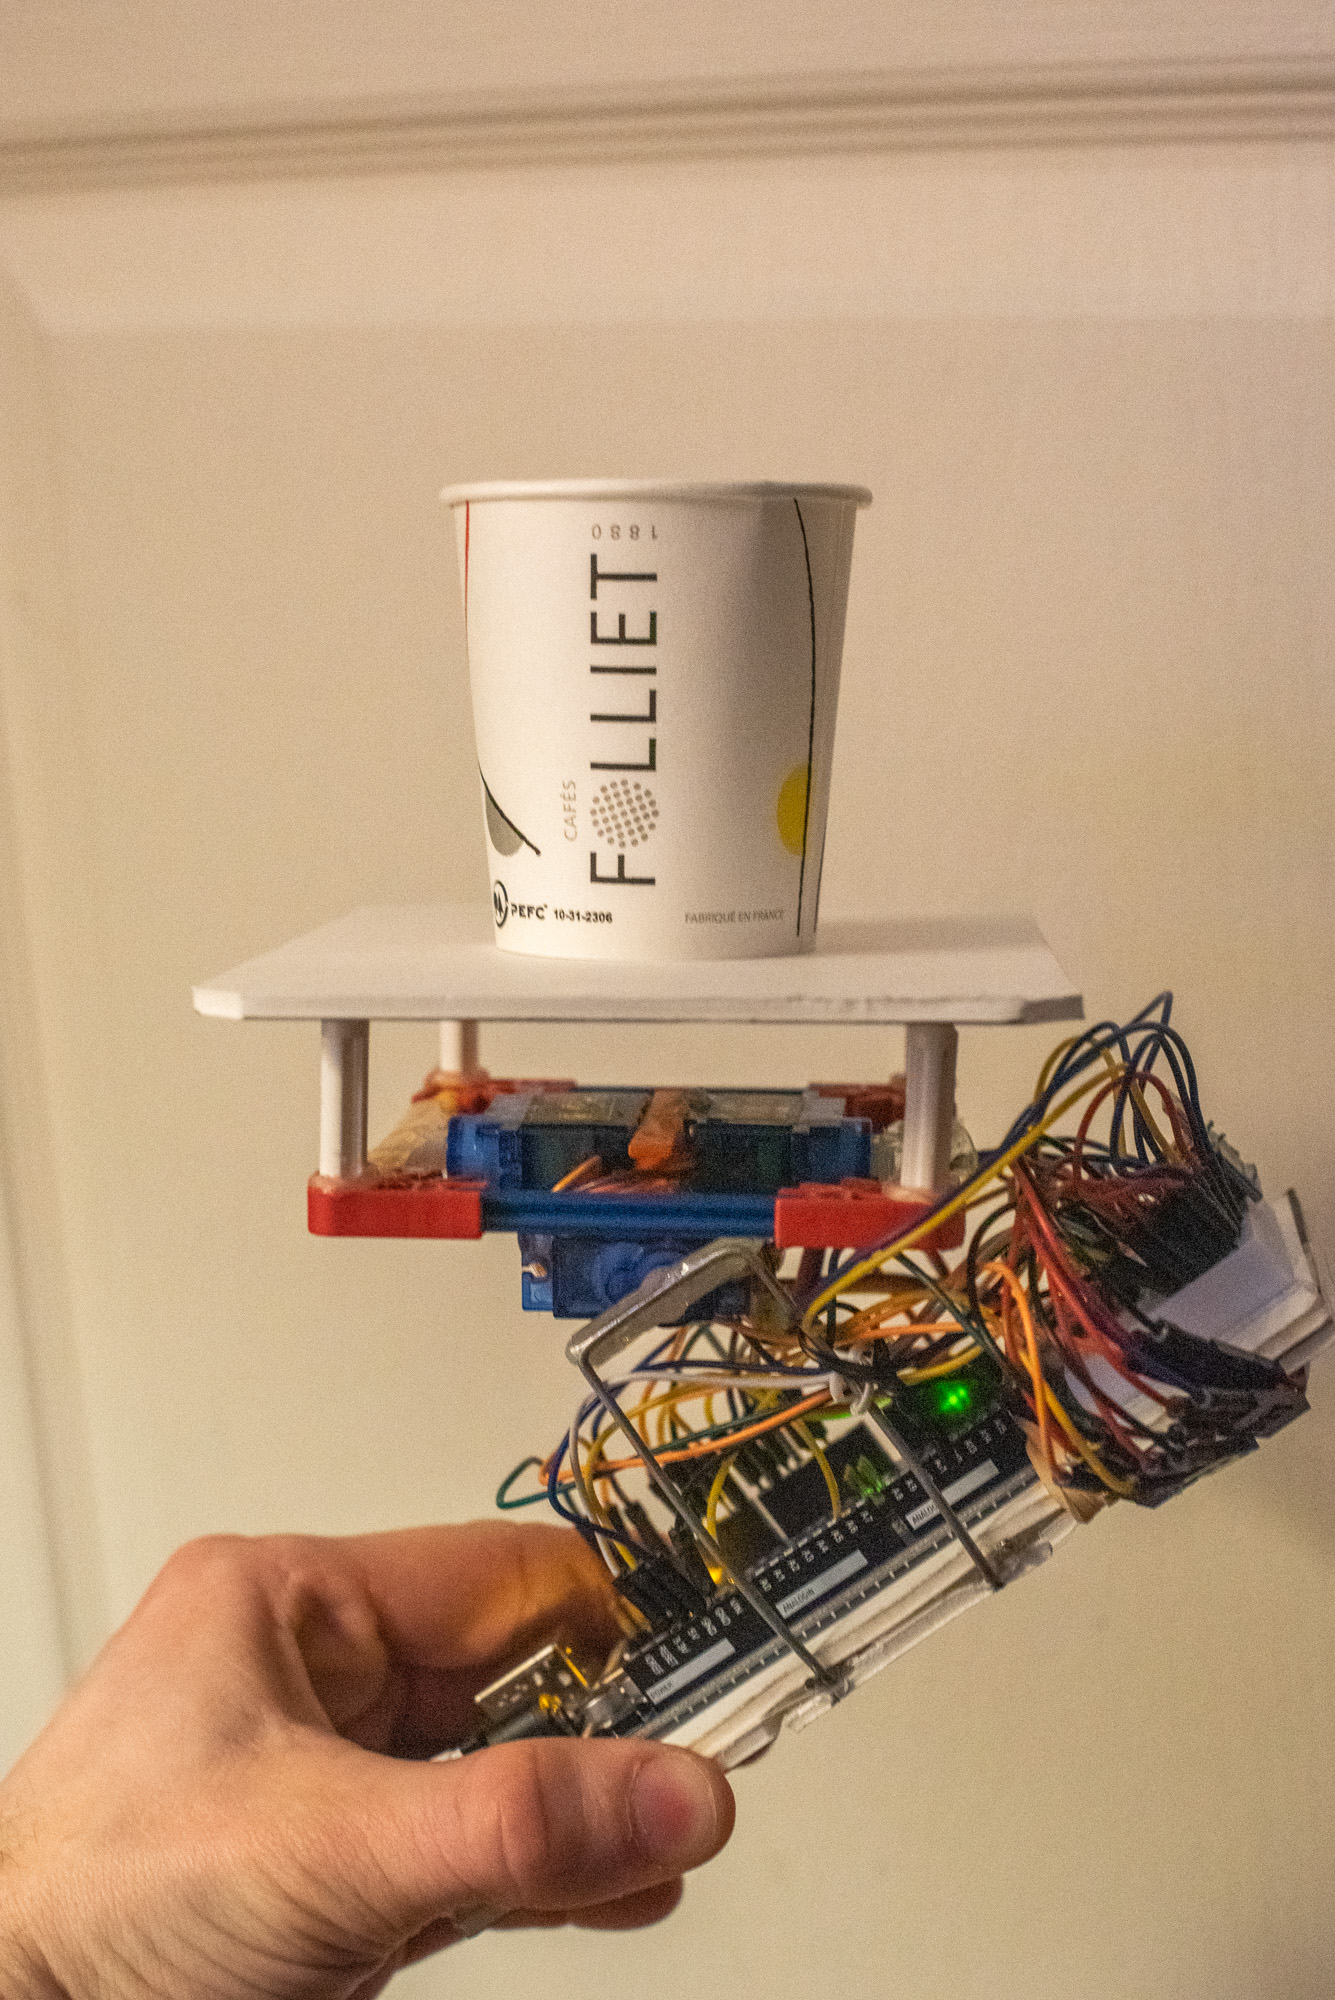
We first envisaged to use a base with a first servo holding some kind of axis, with another servo turned 90 degrees on its extremity. The second servo would then in turn hold another axis with a plate on top.
After many trials and failures, we had our eureka moment when we finally realized we could glue the servos together instead of trying to have them separated.
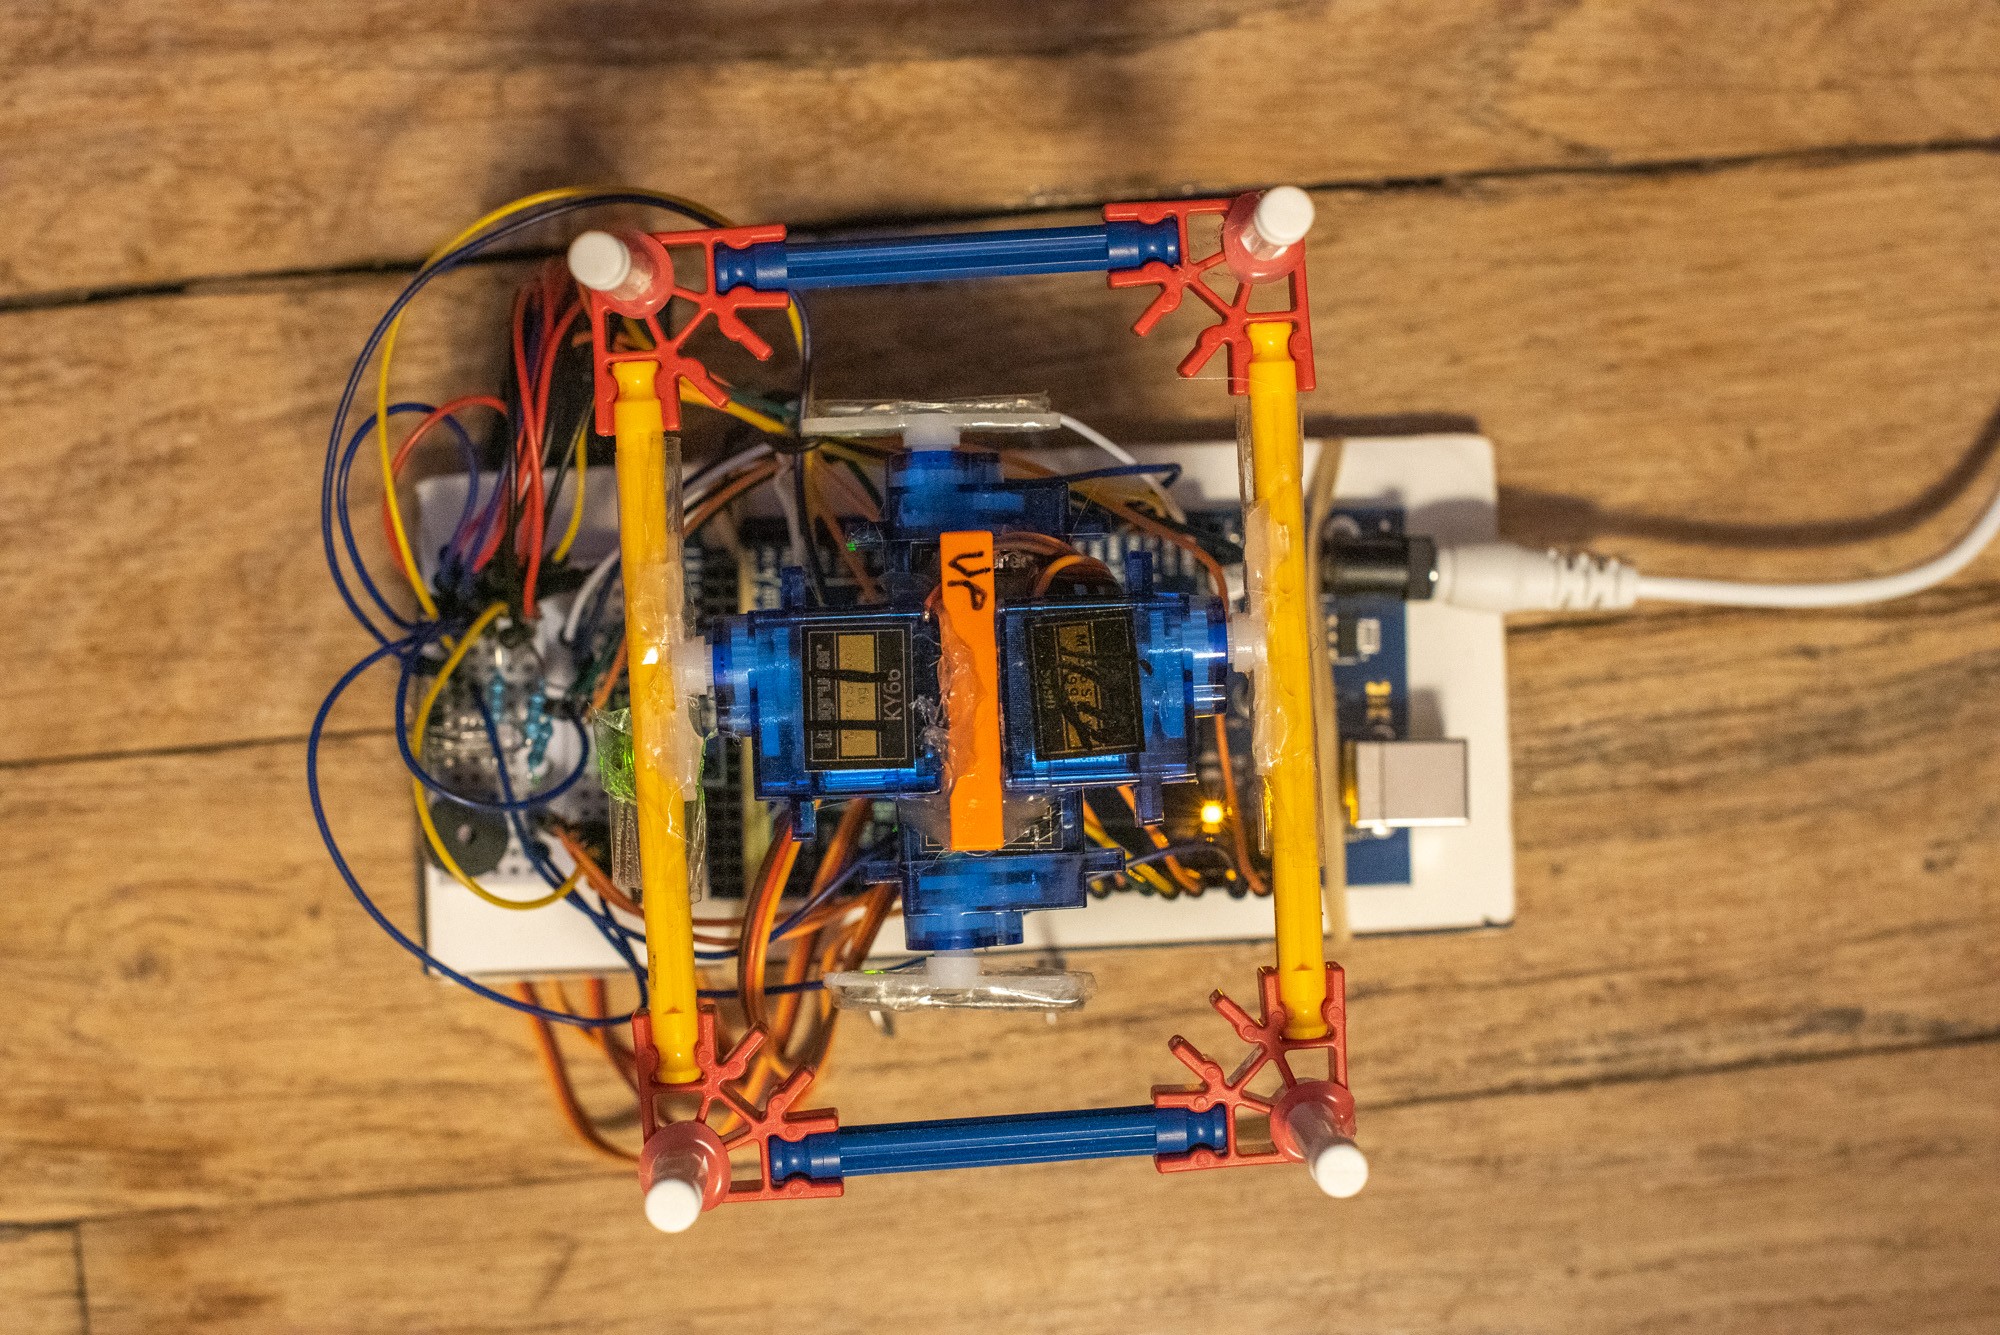
(BTW you may notice that we actually have four servos, not two. This is mainly due to the fact that we had two kits, and a lot of spare parts, but it would probably have worked the same with only two.)
We neither had big tools like saws and drills, nor the time to do something more polished with wood or metal, but fortunately, we had a glue gun and some steel wire.
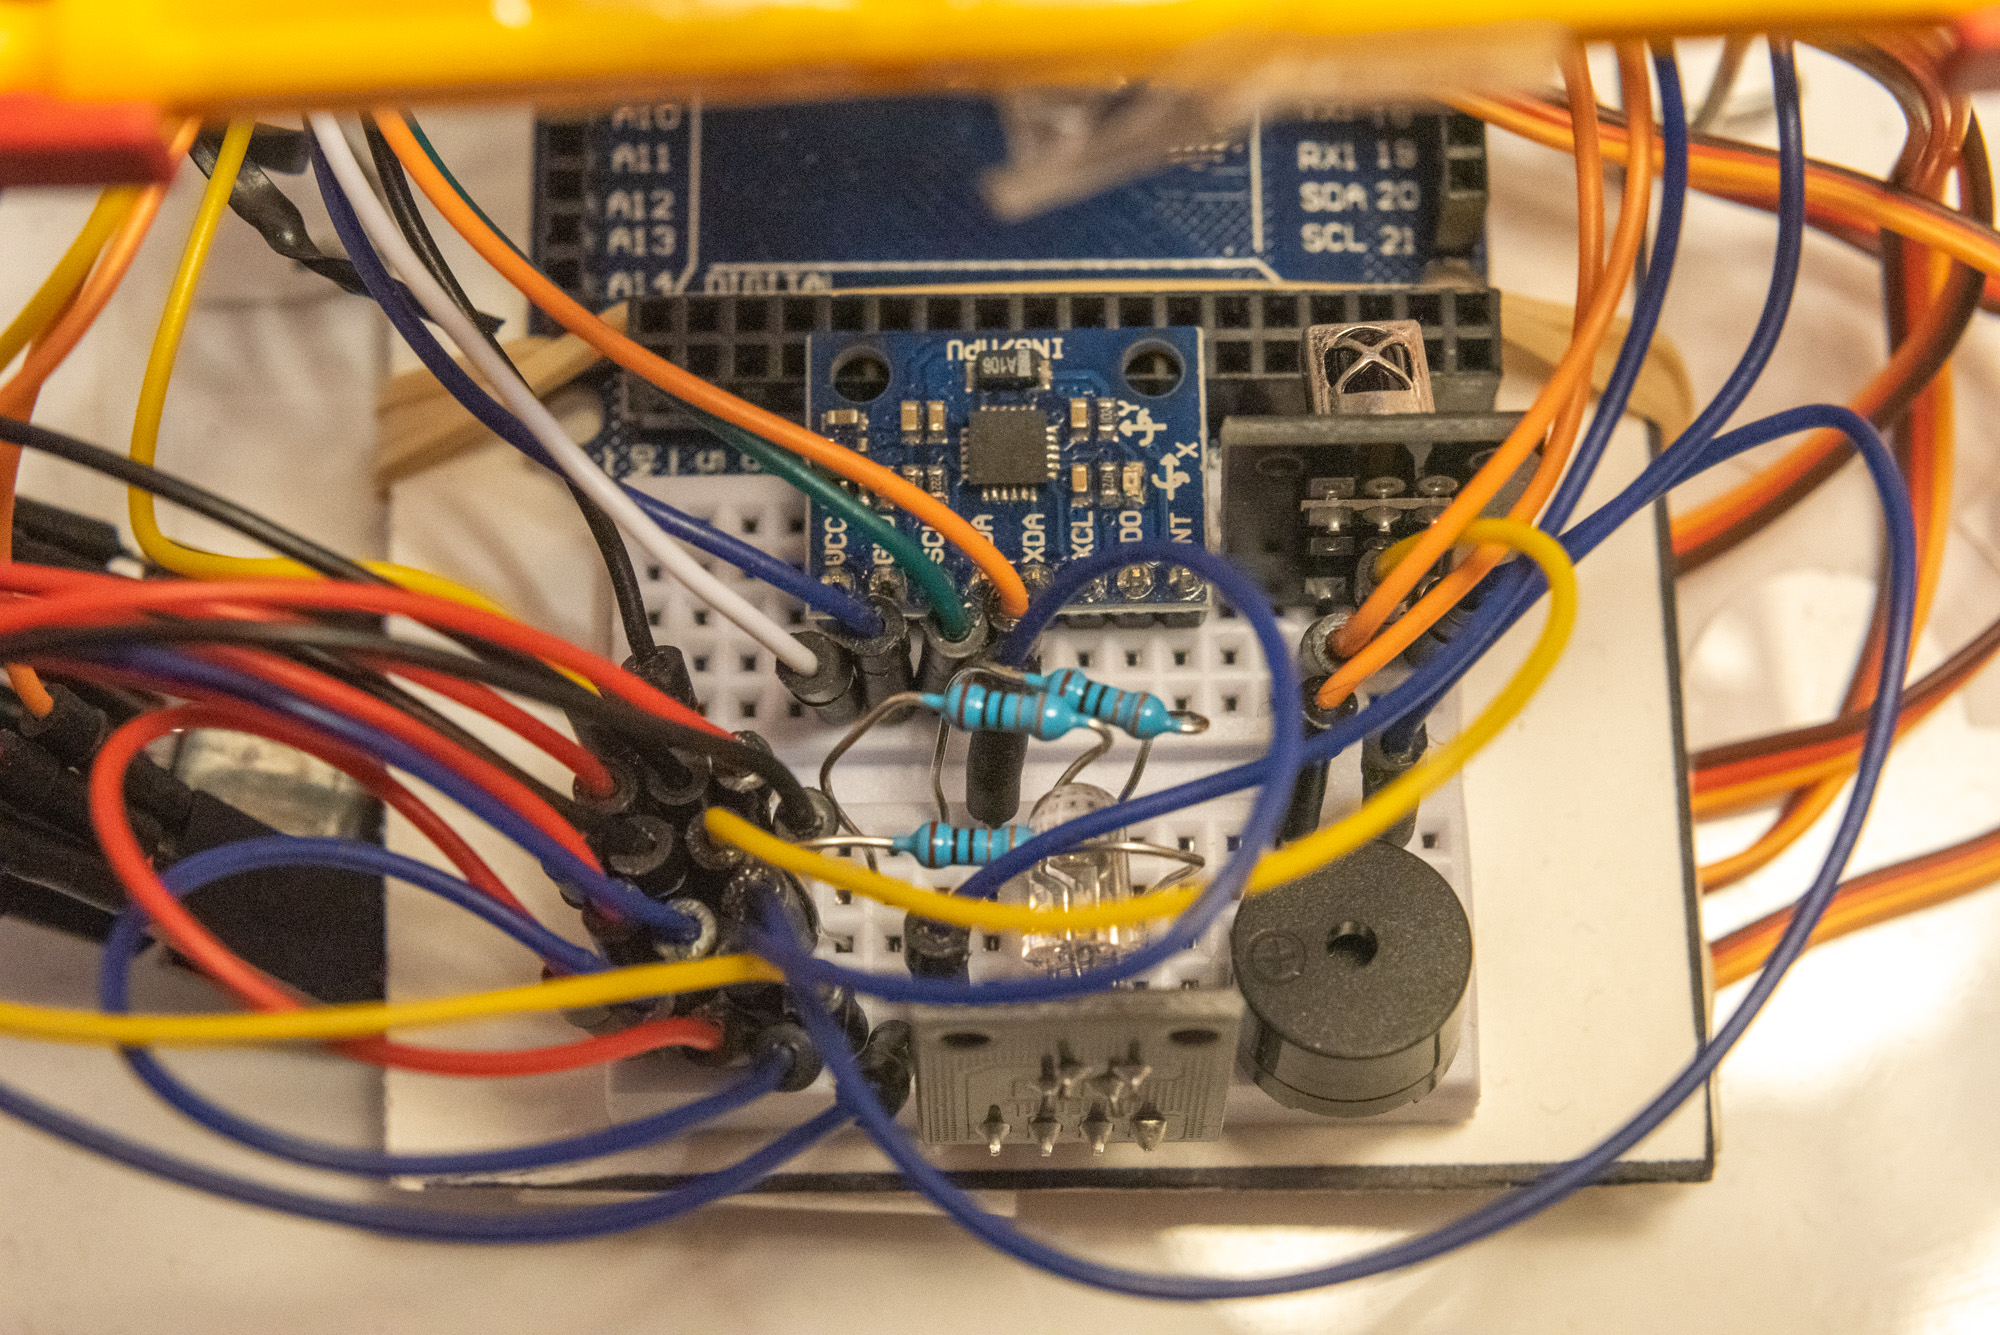
Electronics
The circuit is very straightforward, and is based on the Arduino Mega 2560.
The main part of the project is probably the GY-521 module, with its MPU-6050 chip that contains an accelerometer and a gyroscope.
We basically followed the documentation...
The servos are directly connected to the board, without external power.
Since we had some time left at the end of the project, we managed to also fit an RGB LED and a buzzer, along with an IR receiver to remotely control them...
Software
The Arduino IDE sucks (no auto-completion, among other things), and we didn't have much time, so our stabilization implementation is very basic: we simply poll the gyroscope and output the necessary angles to the servos, so that we offset the detected input angles on both axes.
It works surprisingly well, but not for long: the gyroscope quickly drifts over time, meaning we end up with a not so stabilized plate after just a few dozen seconds.
As mentioned in another better implementation, it's possible to fix that by using the accelerometer, and some maths (something called a Kalman filter), but again, we didn't have much time, and decided to play with light and sound instead...
Arduino limitations
As we already knew, Arduinos are very cool, but fairly limited in terms of hardware.
This had not been a problem until we encountered strange compilation errors, seemingly out of nowhere. After digging into it a bit, we found the cause.
It turns out the Mega only has 6 hardware timers, and they are actually required for a lot of things: driving servos, using the gyroscope, generating sound with the tone() function, using the IR receiver...
User code generally does not directly use timers, but libraries can internally assign several of them, sometimes leading to conflicts when multiple libraries are required.
It's usually possible to reconfigure libraries to fix such conflicts, but since we had used all the available timers, we were stuck.
We initially thought we would have to sacrifice at least one feature, but after some googling and coding, we managed to output a melody without the tone() function, by using a reimplementation of the function that does not use a timer.
Another limitation inherent the the Arduino, and to microcontrollers in general, is the lack of an OS with multi-tasking abilities. Using the gyroscope at the same time a led blinks and a buzzer plays some music is surprisingly difficult when you are used to programming in a higher level environment...
Closing thoughts
It was a fun first experience with Arduino, fitting nicely in our time constraint.
This project has much room for improvement, but still has an easily achievable and satisfying first goal.
Here is the final result in action:
Without the cup:
Photos

The comment is shown highlighted below in context.
JavaScript is required to see the comments. Sorry...